Teslas have the ability to automatically open your garage door as you’re approaching your home. They can also automatically close it as you’re leaving.
They do this by combining the GPS signal with the HomeLink module that opens your garage door.
How to Tell If Your Tesla Has HomeLink
All Teslas are capable of opening garage doors using HomeLink, however not every Tesla comes equipped with the HomeLink module.
If you have a Model S or Model X, then your car already has the capability to open your garage door.
If you have another model, then whether it’s included in your car will vary. Model 3s included HomeLink only up until Spring of 2019. It then became an option that would be installed after delivery through Tesla service. All Model Ys do not have it installed unless it was installed after delivery.
However, the easiest way to tell if your car has a garage door opener is to check on the car’s display. You can go to Controls > Software then tap on Additional Vehicle Information.
This will bring up a screen that will display several important details about your vehicle and the hardware it includes.
The screen will display which full self-driving computer hardware is installed, your infotainment processor and more. It will also display whether you have the HomeLink garage door opener hardware installed.
Next to ‘Garage door opener’, you will either see ‘Not installed,’ or ‘HomeLink 5 (Opt 2).’ The number may vary, but it will mean that you have the HomeLink module installed and your car is capable of opening garage doors.
Program HomeLink Garage Door Opener
If you have a garage door opener in your Tesla, then you can program the car to automatically open the garage door when you pull up to the house.
You can also operate the doors individually through the car’s interface and even operate the main garage door through the Tesla app.
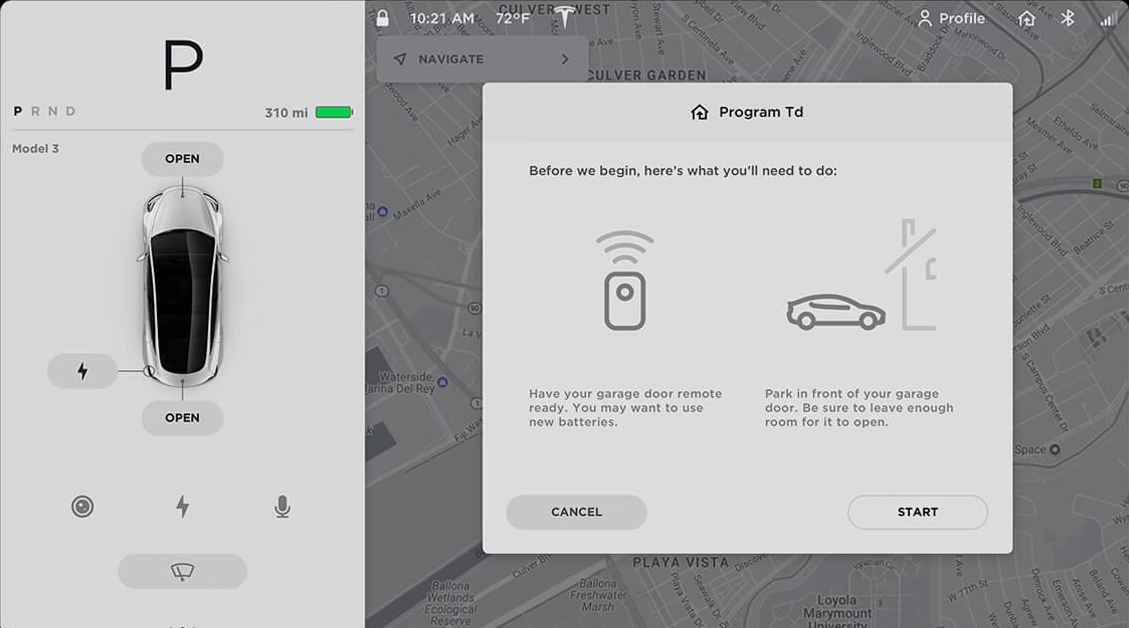
To program your car you’ll need the remote that came with your garage door opener, or easy access to the garage door motor in your garage.
If you’re programming the car using the button on the garage door opener motor, make sure you have plenty of space and a good step ladder because you’ll need to complete the operation in a certain amount of time. If someone is available to help, that will make the process much easier.
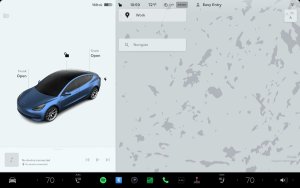
To get started you’ll tap on the HomeLink icon along the top of your Tesla’s screen that looks like a house with an arrow then tap HomeLink Settings.
This brings up the HomeLink screen which allows you to add various garage doors or compatible accessories such as lights or gates.
Start by tapping on Add New HomeLink then enter a name for this garage door, such as ‘Left Garage’ and then tap Create HomeLink.
Standard Mode or D-Mode
You’ll next be presented to set the HomeLink transmit mode. The mode you need to pick will depend on your location and method you’re using to program your car.
Standard Mode - This is the most common mode. If you’re unsure of which to use, you should start with this one, as it’s the simplest to set up. This option requires the use of your garage door remote.
D-Mode - D-mode is usually used in North America. You’ll want to use D-mode if you’re using the ‘Learn’ or ‘Smart’ button on your garage door opener motor.
UR-Mode - UR-mode is similar to D-mode but it’s a standard that’s usually found in Europe, the Middle East and Asia. It’ll also require you to use the ‘Learn’ button on your garage door opener motor.
Set your preferred mode and tap Set Mode.
Next, you’ll want to make sure your car is parked in front of your garage. The car uses this location to determine when to open your garage door when arriving home.
Later you’ll then be able to set how many feet before reaching this location should the car send the signal to open your garage.
Programming With Standard Mode
Get ready to program your car and tap Start. You’ll now want to go outside of your car with your garage door remote and point it at the front bumper closer to the passenger side.
Now press and hold the button that opens your garage door on the remote and keep it pressed. It can take up to 30 seconds to program. Your car’s lights will flash when it’s complete. Keep in mind that your garage door will open or close when you do this, so make sure there is nothing in the way.
Once you see your headlights flash, that means the car was successfully able to record the signal from your remote.
When you go back in your vehicle you should see that the recording was completed and you’re prompted to tap next to continue.
If you’re using Standard Mode, the next step will vary depending on whether your remote is QuickTrain compatible or not.
If your remote is QuickTrain compatible or doesn’t use a rolling code then you can tap Continue, if it’s not either of those, then you’ll be required to press the ‘Learn’ button on your garage door opener motor.
If you’re not sure, you can try pressing continue and see if HomeLink works. If it doesn’t work then you know your remote is not QuickTrain compatible.
Programming With D-Mode or UR-Mode
If you’re using D-Mode or UR-Mode to program your car you will need easy access to the garage door opener motor.
The car will ask you to press the Learn or Smart button on the garage door motor. It’ll be a small button that may be behind a cover or door. It’s usually a bright color such as orange, red, yellow or purple, but it can be any color.
After pressing the button you will need to go back to the car in a short period of time and tap continue. This is to prevent unauthorized use of your garage door.
Testing the Button
After programming your garage door the car will ask you to test it.
The car will have you test the garage door button in the car to see if it works and you’ll be given a chance to go back and choose a different option if it didn’t work the first time.
Once you have your garage doors opening from the car and tap save, you can set various options for the garage door.
Auto Fold Mirrors
This option will cause your car to fold its mirrors right before arriving at your garage. Keep in mind this may make backing out of your garage a little more difficult. Only use this option if you need to.
Auto Open When Arriving
Teslas will combine your GPS signal with your HomeLink transmitter and auto open your garage doors as you’re approaching your house.
This is a really convenient feature and I’d recommend having it on as long as your garage door has the safety sensors at the bottom that will prevent it from closing if anything is in the way.
You can also choose the number of feet away from your garage when the car should send the signal to open it.
It’s nice to have your garage door fully open before you get to it so that you don’t need to stop and wait. However, the number of feet that is right for you will depend on your garage door opener and how far away it could receive a signal.
I’d also recommend having your garage door in view so that for those rare times when you come home and the garage door is already open. This will cause your car to send another ‘open’ signal, causing your garage door to start closing.
It's important to understand that the car has no way to know whether your garage door is open or closed, and unfortunately HomeLink simply sends an "open/close" signal, which causes the garage door to open if it’s closed or close if it’s opened. Some caution is necessary, but the feature works well, especially when you’re arriving home.
Tesla recommends only using the auto-open or auto-close features when your garage door is installed with safety sensors along the bottom.
Keep in mind that the car determines the location of your garage door based on where your car was when you programmed the garage door. The location can be reset at any time.
Auto Close When Leaving
This is the opposite of ‘Auto Open when Arriving’. Your car will automatically send a signal to close your garage door when you’re leaving home.
We do need to be cautious with these features as they’re not discrete open and close signals and they just tell the garage door to switch position.
Reset Location
If you weren’t in front of your garage door when you programmed it, then your car has the wrong location for your garage door. Choosing ‘reset location’ when in front of your garage door will cause the car to change the location of your garage to its current position.
You’ll need to do this for each garage door.
Chime for Auto-Open and Auto-Close
On the HomeLink settings screen you can also set whether you’d like the car to chime before auto opening or auto closing the garage door.
This will have the car make a short ding sound before auto opening or auto closing your garage doors. It’s a little reminder that the garage door is open to move. It also gives you a chance to cancel the auto opening or auto closing procedure before it starts. You’ll see the HomeLink menu come up with a cancel button when this happens.
Limited to 3 Garages or Devices
The HomeLink module that Tesla uses is limited to three HomeLink devices. Unfortunately, this is a limitation of the module itself and not something that Tesla can change.
Add or Install Garage Door Opener in Your Tesla
If you have a Tesla Model 3 or Model Y that does not have the garage door opener, then you can purchase it separately directly from Tesla.
Unfortunately, it can’t be purchased when you buy the car and it needs to be bought and installed by Tesla service after delivery.
The cost for the parts and installation are $325.
If Tesla offers mobile service in your area then it's a convenient and painless process.
Set Which Garage Door Opens In App
In the Tesla app there is a HomeLink icon that will open your garage door. Unfortunately, this button can only be assigned to one garage door.
There is no way to have your Tesla open the other garage doors programmed in the vehicle, however you can pick which garage door to open when you press the HomeLink icon in the Tesla app.
The following procedure requires you to have Enhanced Autopilot (EAP) or FSD. If you go in your car and go to Controls > Autopilot then tap on Summon you’ll be presented with Summon details.
To choose your garage door, tap HomeLink then pick your garage door. You can then turn HomeLink off again. Keep in mind that if you use Summon with HomeLink enabled then you are telling the car which garage door to open before backing out of the garage.
If you do not have EAP or FSD, then you may have to change the order of your garage doors in order to change the one that opens when pressing the HomeLink icon.
Subscribe
Subscribe to our newsletter to stay up to date on the latest Tesla news, upcoming features and software updates.
One of the most common questions new Tesla owners have is about "phantom drain" – the energy your car consumes while it's parked. While Teslas are incredibly efficient, there is still some drain due to certain features being enabled or due to the vehicle’s battery management system (BMS).
While you can’t turn off the BMS, which maintains your battery at an ideal temperature, you can ensure that no features are enabled that consume energy while your vehicle is parked. This is especially important when leaving your vehicle for long periods, such as going on vacation.
We’ll go through all Tesla features that consume energy even when the vehicle is turned off.
As a note, almost all of the features below will automatically disable themselves if your vehicle's battery drops to 20%, thereby preventing them from completely draining your battery. However, this isn’t always enough if you’re leaving your vehicle for several days since the BMS will remain on to protect your battery.
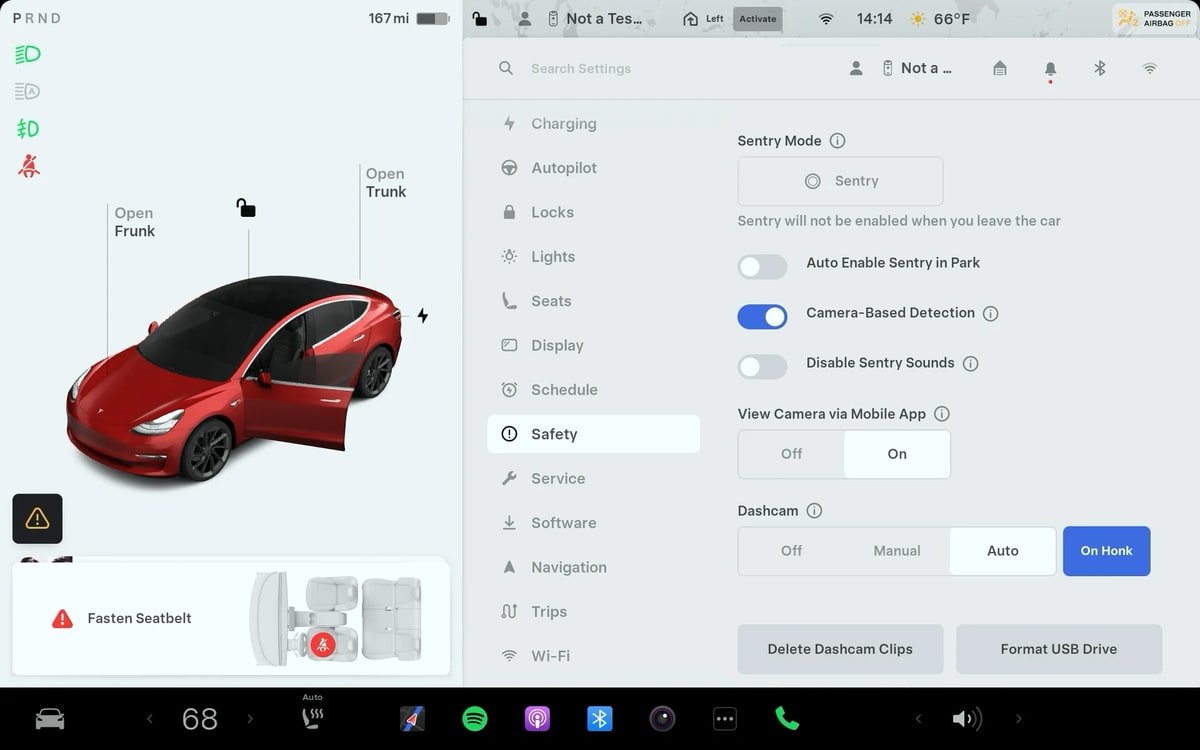
Sentry Mode
Sentry Mode is one of the biggest energy drainers, but it’s also one of the most useful features. It helps protect your vehicle with a 360-degree video security system that surrounds your vehicle, providing alerts and recordings in the event of an incident.
Sentry Mode continuously processes video from up to six of your vehicle’s cameras. This requires leaving the Autopilot computer and cameras active, resulting in high energy usage. Sentry mode consumes roughly one to two miles worth of battery per hour, but this number varies depending on your specific model. The average person drives about 32 miles per day (12k miles per year), which means that Sentry Mode costs about 50% of the cost of driving the vehicle.
There’s no doubt that Sentry Mode is useful, but it should be used selectively in areas that may be more prone to break-ins.
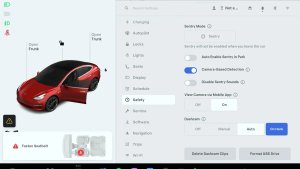
You can turn Sentry Mode on or off by going to Controls > Safety > Sentry Mode on your vehicle touchscreen. You can enable Sentry Mode for single instances by going to Controls > Sentry Mode, which will turn it on for that one parking session only. You can also exclude locations where Sentry Mode won’t come on, such as Home, Work or locations listed in your favorites.
Sentry Mode can also be enabled or disabled from the Tesla App from Security & Drivers > Sentry Mode.
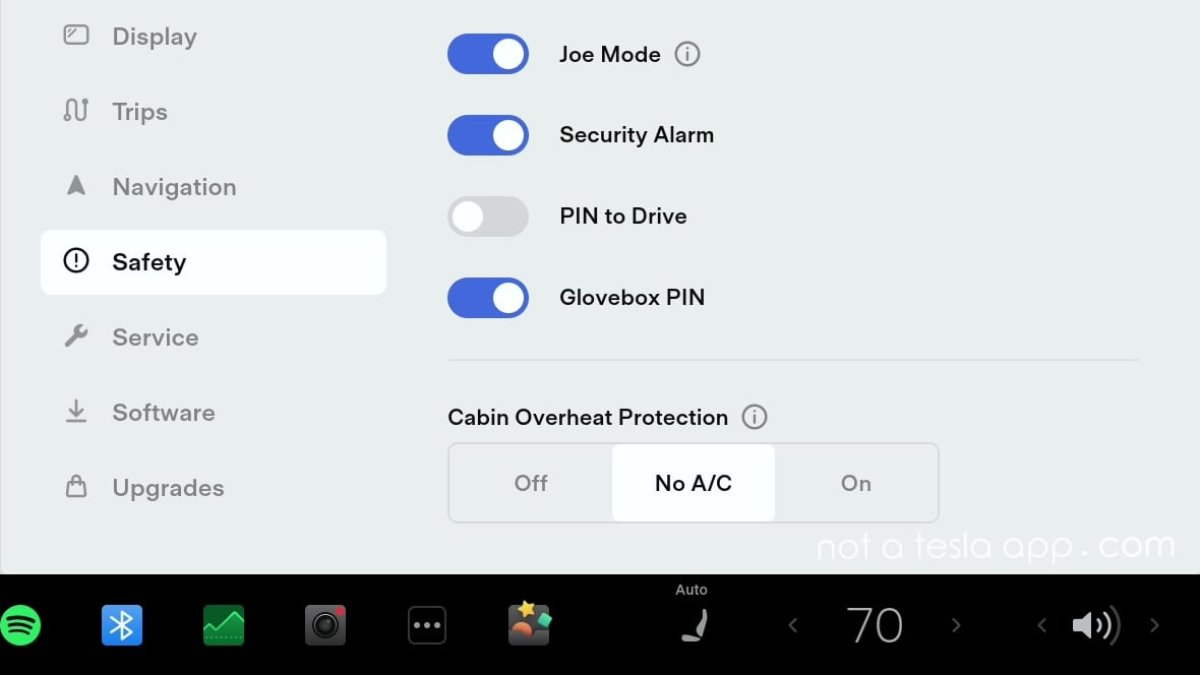
Cabin Overheat Protection
Not a Tesla App
Cabin Overheat Protection helps to keep the interior of your car from reaching dangerously high temperatures on hot days. This does not keep humans or pets safe, but it does help to keep temperature-sensitive items at a more reasonable temperature if you leave them inside, such as electronics.
You can turn it on and adjust the settings from Controls > Safety > Cabin Overheat Protection. The feature offers three options: Off, No A/C, and On.
The No A/C option will use the fan to circulate air once the cabin temperature exceeds 105ºF without using the A/C. This option helps conserve energy while also usually preventing the vehicle from getting too hot. However, if the vehicle is parked in the sun on an extremely hot day, it can still reach temperatures of 130ºF or higher.
In most cases, it does help keep the steering wheel and seats cooler and it’s a good balance between keeping the option off completely or having it use high amounts of energy.
If you select the AC option, you can set the activation temperature to 90°F (32 °C), 95°F (35°C), or 100°F (40°C). The chosen temperature and the temperature outside will play a significant role in how much energy this feature actually uses, especially on a hot summer day.
Cabin Overheat Protection has no bearing on the safety or functionality of your vehicle and only operates for up to 12 hours after leaving the vehicle. We generally don’t recommend enabling this feature unless you have a specific reason to do so.
You can also enable or disable Cabin Overheat Protection, as well as adjust the operating temperature from the Tesla app by selecting Climate and then swiping up on the temperature module at the bottom of the screen.
Keep Accessory Power On
Not a Tesla App
Now available on all vehicles as of Tesla’s 2025 Spring Update, Keep Accessory Power will keep your 12V power sockets and USB ports active without needing to use Camp Mode. This also keeps the wireless phoen chargers enabled, letting you charge or power a device while you’re not in the vehicle. However, this option does use a good amount of energy, even if there are no devices plugged in.
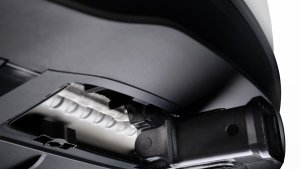
The Model Y and Model X include a 12V socket in the rear left pillar of the vehicle, alongside a 12V socket in the front of the vehicle. The Model 3 and Model S only have a 12V socket in the front of the vehicle. For the Cybertruck, this feature keeps the 120V and 240V in the rear active as well.
You can turn this feature on by going to Controls > Charging > Keep Accessory Power On. This feature is disabled by default and is turned off once the vehicle battery drops to 20% or below. However, it will remain on any time the vehicle has a 20% or higher state of charge, which could cause long-term battery drain issues.
This feature should only be used when you actively need it and then should be turned off. Several people have fixed their battery drain issues in their vehicles after realizing this option was left on.
Similar to Sentry Mode, this feature can use up to one mile per hour of range when enabled, even if there are no devices plugged in. It will consume slightly more energy while charging devices, depending on the device.
Summon Standby
Summon Standby keeps your car in a low-power state, meaning that the vehicle’s Autopilot is asleep, but not turned off. When the vehicle receives a summon request, it’s ready to go almost instantly, instead of the user having to wait for the vehicle to wake up and power on.
Without Summon Standby, it can take 30 seconds to a minute for Summon to be available through the Tesla app.
This feature doesn’t draw as much power as Sentry Mode, but it’s similar. It can consume about 0.5 to 1 mile of range per hour. We don’t recommend keeping this option on unless you Summon your vehicle often.
Note: If you keep Sentry Mode on, Summon is also available immediately, as the Autopilot computer is already powered on and the vehicle doesn’t go to sleep.
Third-Party Services
Third-party apps that track your car’s data through the Tesla API can wake up your vehicle or prevent it from sleeping properly. While Tesla’s API has been improved to prevent some of these issues, the newest features aren’t available for the legacy Model S and Model X.
These services will only cause a noticeable difference in battery drain if they’re preventing your vehicle from falling asleep. You can tell if your vehicle is asleep by opening the Tesla and seeing the status of your vehicle in the top left corner.
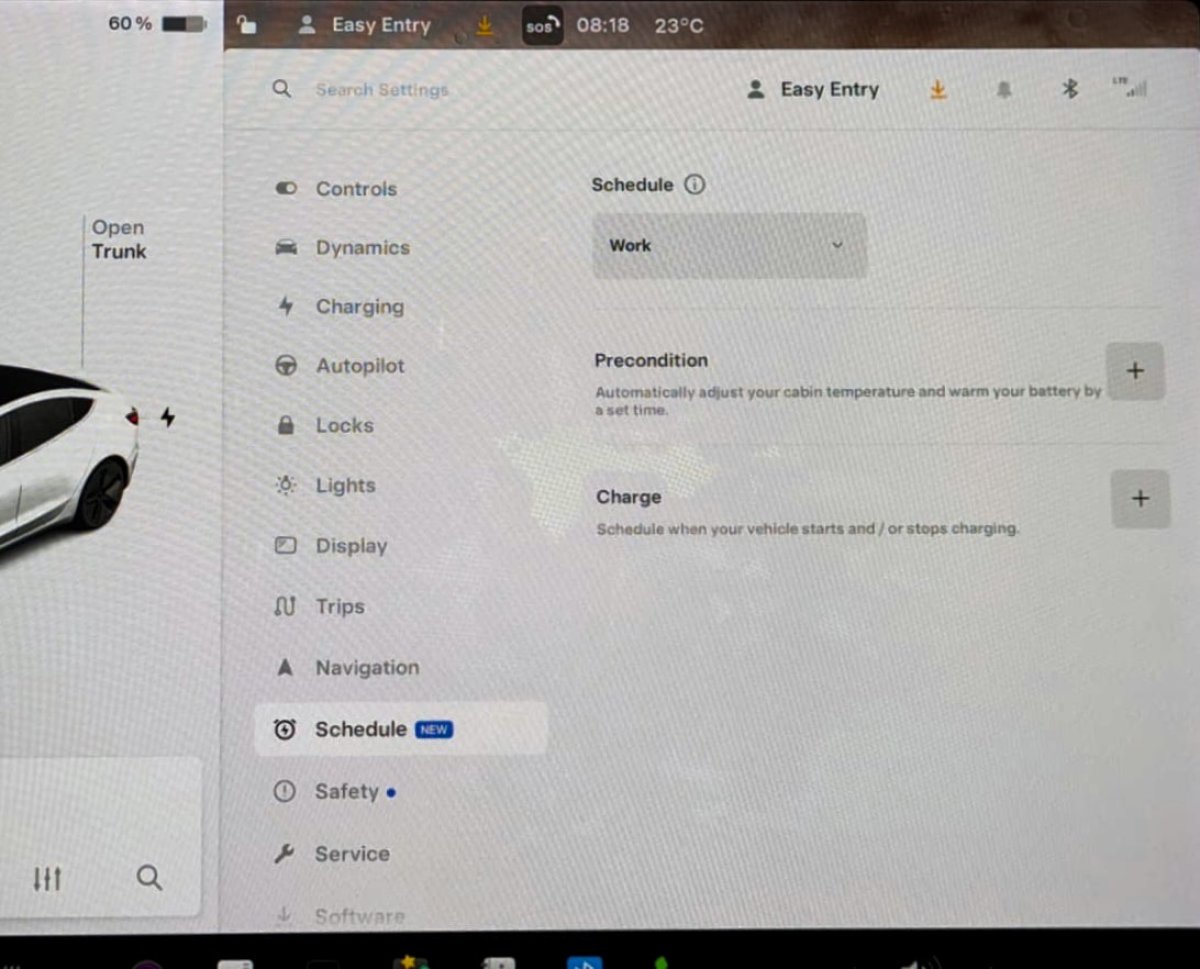
Scheduled Preconditioning
enjustice3192/Reddit (Edited by NATA)
You can schedule times for your vehicle to automatically precondition the cabin, letting you get into a prefectly warmed or cooled vehicle every morning and evening. While this feature is great if you have a consistent schedule, it can also be the cause of some additional battery drain.
Preconditioning your cabin, either through the scheduled process or manually as a one-time action through the Tesla app, also warms up the battery, which can help improve regenerative braking on cold days or speed up Supercharging on trips.
If possible, keep your vehicle plugged in while preconditioning, as it will draw power from the wall unit instead of the vehicle battery, preventing the vehicle’s range from being lowered. Even a 120v plug can help in these situations.
You can check or adjust your vehicle’s scheduled preconditioning times by going to Controls > Schedule in the vehicle or navigating to Schedule in the Tesla app.
Climate - Dog, Camp, and Keep Modes
Not a Tesla App
Tesla also offers several options to keep your climate system running once you’ve exited the vehicle, either to keep it warm or cool while you’re making a stop.
To enable or disable any of these settings, swipe up from the temperature on your vehicle display while the vehicle is in Park, and then touch Dog Mode, Camp Mode, or Keep Climate.
Dog Mode
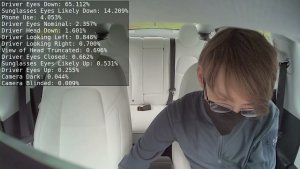
Dog Mode is designed to keep a comfortable temperature for your pet while active. You can monitor the temperature remotely, as well as see into the Cabin Camera while Dog Mode is active. This mode also displays the current cabin temperature on the center display, helping inform nearby passersby that your pet is safe and comfy.
As a note, Dog Mode disables the window controls inside the vehicle.
Camp Mode
Camp Mode enables you to power electronics through the USB ports (or low-voltage outlets) while maintaining cabin temperature. The touchscreen also remains on, allowing you to listen to music, play games, or watch movies. The doors will also remain unlocked, and Tesla’s walk-away door lock feature will be disabled. This is ideal to use when you’re stepping away from the vehicle with someone still inside it and want the doors to stay unlocked and the alarm to remain off.
Keep Climate
Keep Climate will keep the vehicle’s temperature at the currently selected temperature while you step away. All other features remain on, such as auto door locking. This is a good option if you’re running in quickly to pick up a child at school or daycare and want to keep your vehicle comfortable without having to remember to preheat or precool the vehicle. Keep Climate will stay enabled for up to two hours, or until the battery reaches 20%, so it isn’t a long-term cause of battery drain.
While Tesla vehicles come with numerous useful features, it’s important to know which ones consume energy even when your vehicle is parked, which could offset any potential gas savings. Use these features selectively when needed, rather than leaving them on 24/7, as they’ll continue to consume power even through the night when you’re unlikely to take advantage of them.
If you’re experiencing issues with battery drain, we recommend going through this list of features and confirming that each one is turned off.
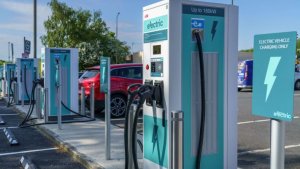
In a move that has both surprised and frustrated Tesla and non-Tesla owners, the New Jersey Turnpike Authority (NJTA) is actively removing Tesla Superchargers from its service plazas, replacing them under an exclusive agreement with Applegreen Electric—the company that operates the plazas.
This transition, which was officially announced by the Tesla Charging account on X, will see all 64 of Tesla’s V3 Supercharger stalls removed from the Turnpike. This has raised some eyebrows, especially as the Applegreen sites, which will only feature CCS1 plugs, won’t be online until later this year.
The New Jersey Turnpike Authority ("NJTA") has chosen a sole third-party charging provider to serve the New Jersey Turnpike and is not allowing us to co-locate. As a result, NJTA requested 64 existing Supercharger stalls on the New Jersey Turnpike to not be renewed and be… pic.twitter.com/sosNIwMfYu
Tesla’s presence on the Turnpike dates back to 2014 when the NJTA granted Tesla a pilot license for just eight Supercharger stalls. That then rapidly expanded, and by the end of 2023, Tesla had 64 V3 Supercharger stalls active across the Turnpike, boasting their usual impressive 99.9% uptime, with a 30% lower cost than competitors nearby.
With the increasing adoption of the North American Charging Standard (NACS) by other automakers, Tesla's network is becoming the de facto fast-charging standard for a growing number of non-Tesla EVs, which makes this decision even harder to justify. Not only will Tesla vehicles be unable to charge at these locations, but many new EVs with NACS ports will also be left out.
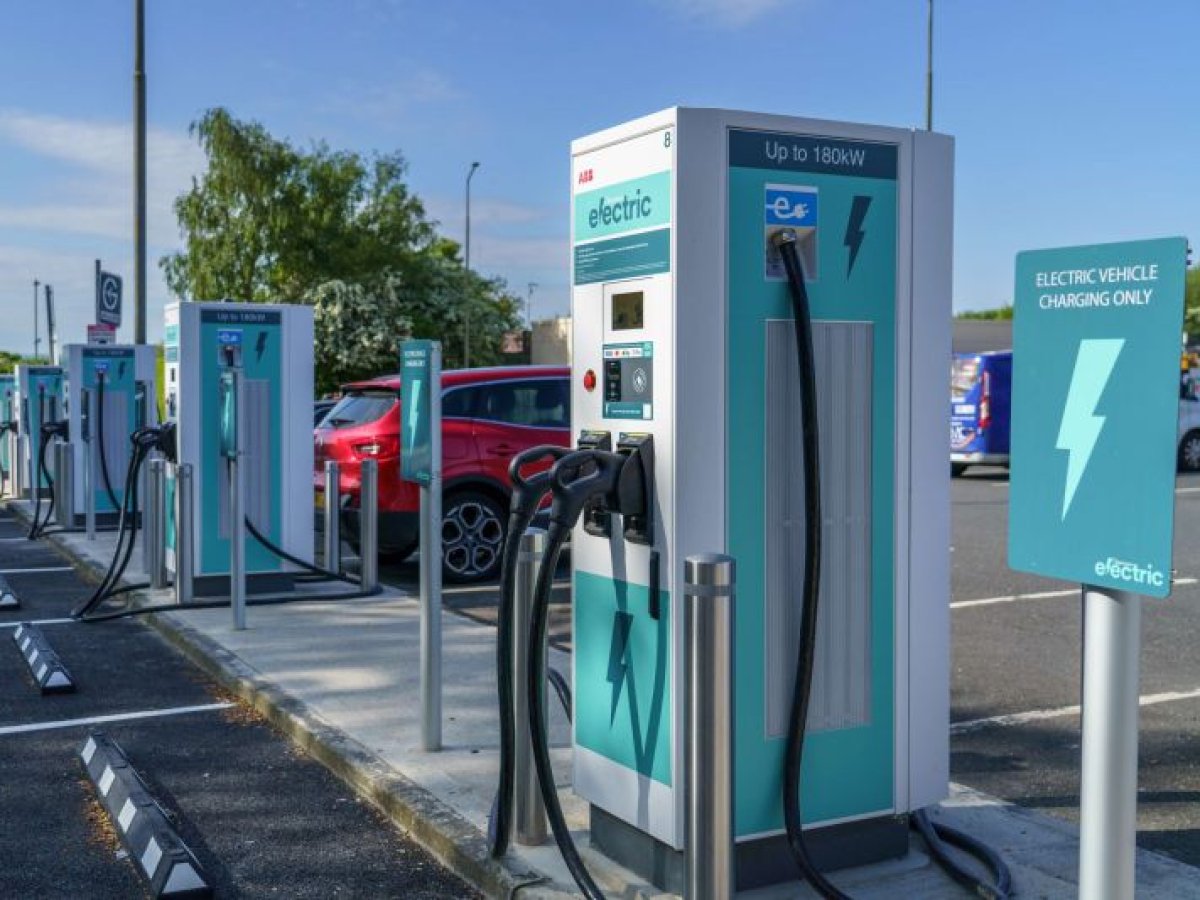
Applegreen
Applegreen’s chargers are less than ideal. They resemble gas stations for EVs, which is a huge step back from Tesla’s elegant solution. Besides currently only supporting CCS1 and CHAdeMO charging connectors, which leaves out the majority of EVs, they also provide a worse charging experience.
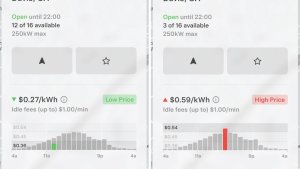
These locations are often more expensive than Tesla Superchargers, but just like Tesla, the price does vary by location. We spot-checked several locations and noticed that prices were roughly about 10% higher per kWh than a similar Tesla charger nearby. Applegreen’s chargers also include screens and a credit card slot, requiring customers to pay for their charging sessions, just as they would for gasoline.
While we don’t have statistics on their uptime, it’s hard to argue that it’d be better than Tesla’s, which has live monitoring and often fixes issues within hours, which was recently demonstrated when it rebuilt a Supercharger less than 48 hours after it was burned down. Many users complain of Applegreen’s chargers, saying they don’t work or are difficult to use. Their app on iOS currently has a 1.9 rating out of 5.
Tesla’s Proposal
The landscape for EV charging on the Turnpike shifted in March 2023, when the NJTA amended its agreements with Applegreen to make it an exclusive offering. Despite Tesla offering what it cites as above-market terms, which included upgrading all Superchargers on the Turnpike to include Magic Docks (NACS + CCS1 chargers) for universal EV compatibility and card readers for better billing for non-Tesla owners. Tesla also offered to co-host, allowing Applegreen chargers and Tesla Superchargers to be located side by side. However, NJTA still declined to let Tesla keep any of its existing Superchargers online.
This is clearly a move for Applegreen to capitalize on its property and generate revenue by installing its own branded chargers. However, with Applegreen’s chargers only having CCS1 cables, calling them “universally” compatible while making Tesla’s seem exclusive to Tesla vehicles is laughable. This is clearly a step in the wrong direction that will hurt all EV owners. If anything, NJTA should be requiring Applegreen to maintain Tesla’s Superchargers on the premises, while also allowing Applegreen to install their own chargers.
NJTA instead announced that Tesla must decommission its Superchargers soon, which will leave EV drivers without viable options while traveling on the 117-mile-long NJ Turnpike. That’s millions of dollars of Tesla charging infrastructure that’s already being used - being removed without a replacement in place for potentially months.
The decision has been met with some widespread criticism over the last few days. The reduced options, reduced convenience, increased costs, and reliability concerns are chief among the concerns of Tesla and other EV drivers. However, the lack of transparency behind the decision, as well as the exclusivity to Applegreen, has led many to accuse the NJTA of corruption and backdoor deals, including Elon.
Anticipating the worst, however, Tesla’s Supercharging team has been working to ensure charging continuity. Between 2022 and today, Tesla has proactively built 116 replacement Supercharger stalls at eight new locations just off the Turnpike, anticipating this would happen. While this will make it less convenient for EVs reliant on NACS, it won’t leave them stranded without a place to charge. Tesla’s trip planner has already been adjusted to route drivers to these new sites as well.
While Tesla is clearly invested in expanding access to electric vehicle charging - whether for its own direct customers or for other EVs, it seems that some organizations believe the easiest way to meet “green goals” is to find the solution that’s best for their pocketbook.
We’re hoping that these types of exclusivity deals don’t become common as they harm all current EV owners and reduce electric vehicle adoption.


![Tesla’s Optimus Is Now Learning by Watching — First Person Today, Third Person Tomorrow [VIDEO]](https://www.notateslaapp.com/img/containers/article_images/2025/optimus_cleaning.png/bd519f7f31d9c3e7e25c2736ee284efb/optimus_cleaning.jpg)