Tesla Sentry Mode: What It Is, How to Use It and Battery Drain


Tesla Sentry Mode is an intelligent vehicle security system designed to monitor and record potential threats around your parked Tesla. This feature utilizes the vehicle's cameras and sensors to detect suspicious activity, notify the owner through the Tesla mobile app, and save footage to a USB drive.
What is Sentry Mode
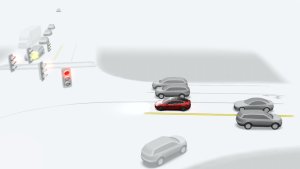
When enabled, Tesla Sentry Mode keeps the vehicle's cameras and computer powered on and ready to record potential threats while the car is locked and in Park. If a threat is detected, the system pulses the headlights, displays a message on the touchscreen, and may sound the alarm, depending on the situation. In addition, footage of the event is saved to a USB drive, and the owner will be notified via the app if the alarm goes off. Sentry Mode offers an extra layer of security for Tesla owners, helping to deter would-be thieves or vandals.
Cameras and Sound
While Sentry Mode is enabled, it will record from four of the vehicle's nine available cameras. The video recorded comes from one of the front-facing cameras, the fender camera on either side of the vehicle, and the rear camera. The other remaining front-facing cameras, B-pillar cameras, and the cabin camera do not record at this time.
Teslas do not contain any external microphones, so all Sentry Mode videos are silent. Although Teslas do contain internal microphones, Tesla does not capture audio from these microphones. In fact, even if you're viewing the interior camera in the Tesla app, you can not hear any audio from inside of the vehicle.
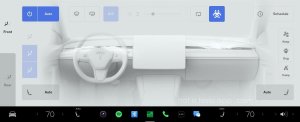
How to Turn On Sentry Mode
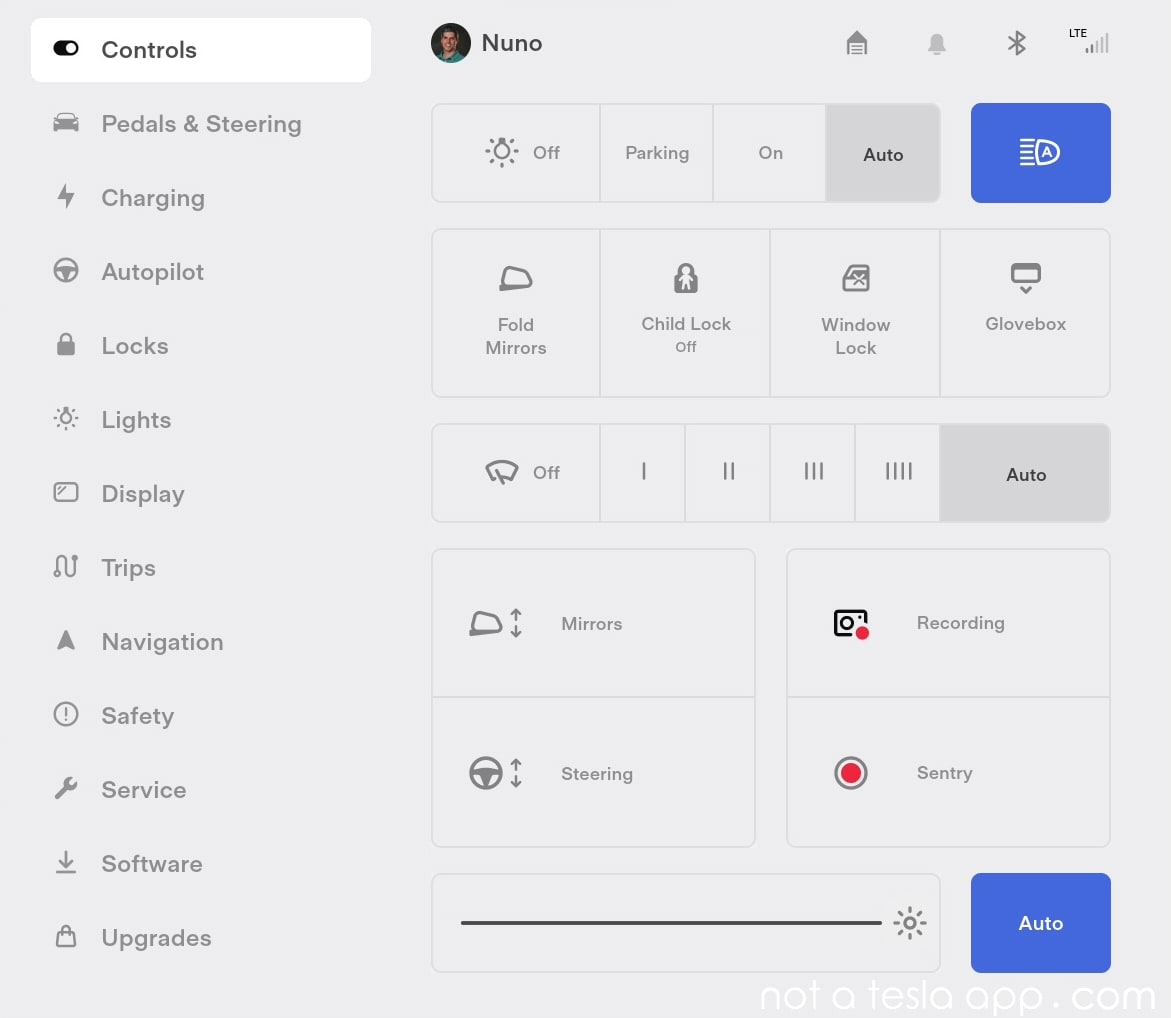
You can enable Sentry Mode by tapping Controls then tapping 'Sentry.' The Sentry Mode icon will turn red when Sentry Mode is enabled. You can also choose to turn on Sentry Mode automatically when the vehicle is parked or activate it using the Tesla mobile app. Voice commands like "Keep Tesla safe," "Keep my car safe," "Sentry on," or "Enable Sentry" can also be used to enable the feature.
How Long Does Sentry Mode Stay On
Once Sentry Mode is enabled, it will remain on until you turn it off, or when your battery reaches 20%. If the battery falls below this level, Sentry Mode will turn off, and you will receive a notification via the Tesla app. Since Sentry Mode increases power consumption, Tesla turns it off automatically to leave you with enough energy to reach your destination.
Sentry Mode Battery Drain
Since your vehicle's computer needs to remain on to process video from its various cameras, there is additional power usage while Sentry Mode is enabled.
The actual amount of power consumed varies based on your vehicle's specific hardware, but tests have shown that the vehicle will consume about 250 to 300 watts while Sentry Mode is on. This is equivalent to losing about 1 mile of range for every hour Sentry Mode is enabled.
In a day, Sentry Mode may consume as much as 7.2 kWh, about 24 miles of range, or roughly equivalent to 7% to 14% of your battery, depending on your model and battery size.
Since Sentry Mode consumes so much energy, it's best to use it only when needed. Sentry Mode is not meant for when your vehicle will be parked long term, as it'll quickly drain your battery. Luckily, Tesla offers options to automatically enable Sentry Mode at specific locations and Sentry Mode is automatically disabled when the vehicle's battery falls to 20%.
Sentry Mode Options
You can customize Sentry Mode settings to fit your preferences and requirements. Some options available include:
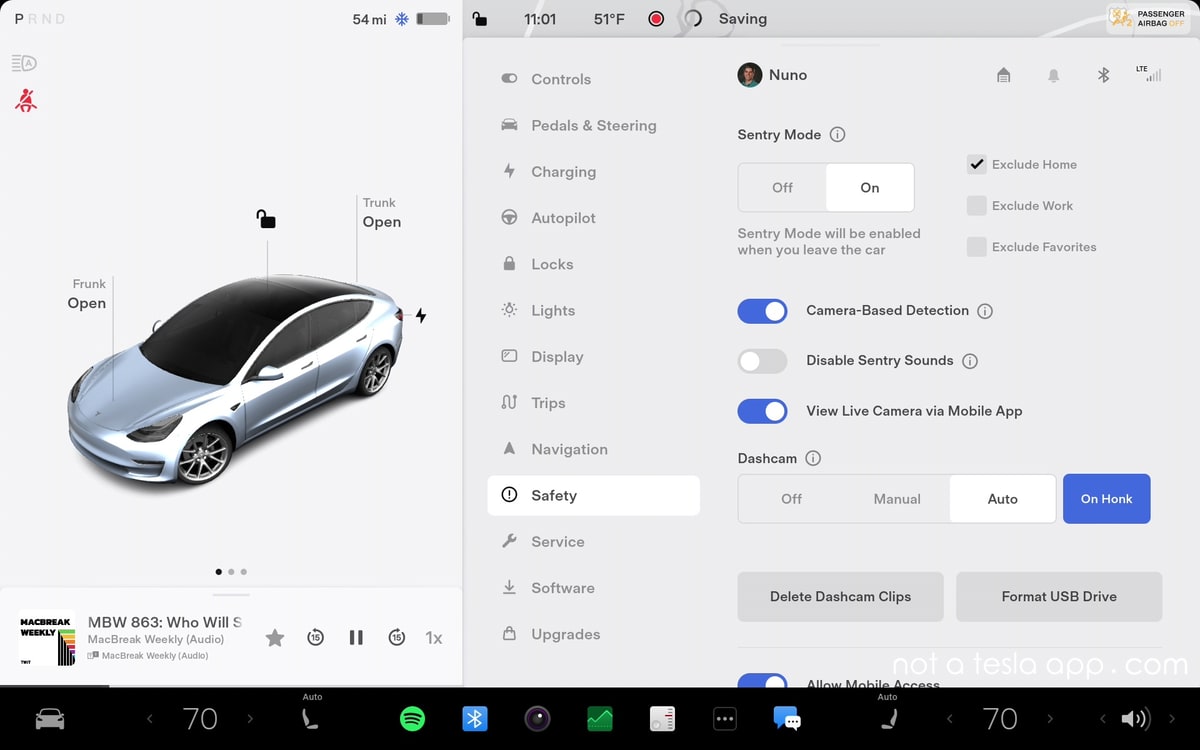
Disabling sounds: If you want to silence the security alarm and audio system when the alarm is triggered, navigate to Controls > Safety > Disable Sentry Sounds. Sentry Mode will still send a notification through the mobile app and save the last 10 minutes of footage of any events that occurred.
Excluding specific locations: In Controls > Safety > Sentry Mode, you can choose not to enable Sentry Mode in particular areas, such as your home, work, or favorite destinations. This can be helpful if you want to conserve battery power or avoid unnecessary recordings in familiar areas.
Choosing the clip length: In some markets (Not available in the U.S. and Canada), you can select the length of Sentry Mode video clips, allowing you to customize how much footage is saved during an event.
Disabling camera detection: If you prefer, you can disable camera detection so that Sentry Mode only activates when the car senses a physical intrusion. This can be helpful in situations where you want to minimize the number of false alarms or unnecessary recordings.
How to Set Up Sentry Mode
First, insert a compatible USB drive into the glove box USB port. If your car doesn't have a USB port in the glove box, you can use one in the center console. Note that not all Teslas have data-capable USB ports in the center console, so the glove box should be your first choice. Chances are that Tesla already included a compatible USB drive in the car for you. Tesla defines a compatible USB drive as one that is USB 2.0 compatible and holds at least 64 GB. This Samsung USB drive is a good choice for Sentry Mode because of its durability and size. It offers fast write speeds and 256GB of storage, 4x Tesla's recommendation.
Next, you can format the USB drive by going to Controls > Safety and tap on "Format USB Drive." Tesla recommends using a high-quality USB drive to ensure smooth recording and playback of Sentry Mode videos. You can also enable Dashcam recording. Navigate to Controls > Safety > Dashcam in your vehicle's menu and set it to Auto. This will allow your vehicle to automatically record footage while driving. Footage will automatically be recorded when an event is detected or when you tap the Dashcam icon under Controls > Dashcam.
How to View Sentry Mode Recordings
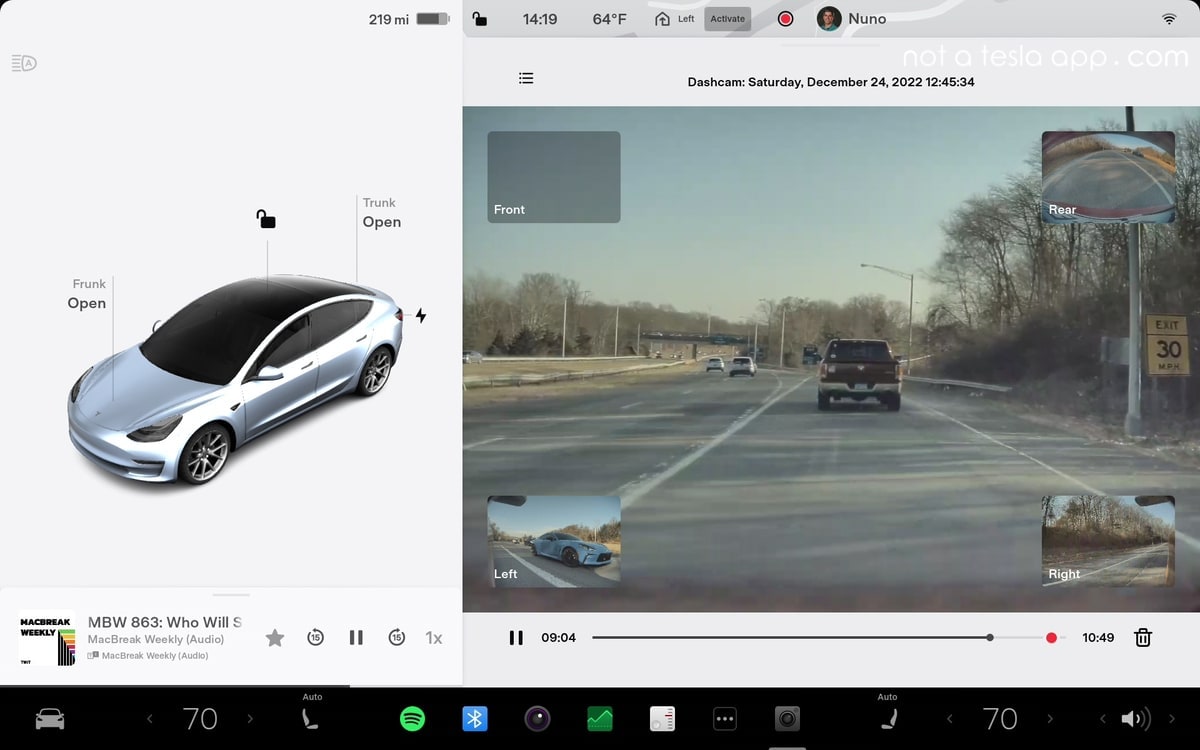
To view Sentry Mode or Dashcam videos, use the Dashcam app in your vehicle. The Tesla system tags events with a red dot, making locating and reviewing footage easier. This feature allows you to quickly identify any incidents around your vehicle and gather evidence if necessary. Remember to regularly check your USB drive's storage capacity, as new recordings will overwrite the oldest ones when the drive is full. It's a good idea to back up important footage to a separate storage device for safekeeping.
Sentry Mode Live Access
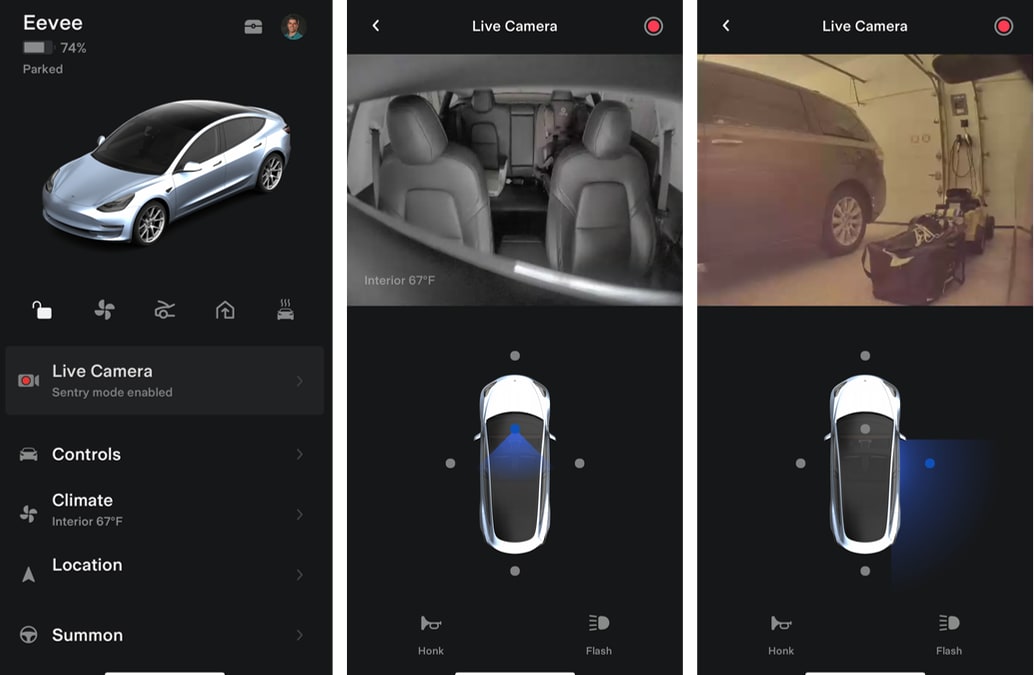
Sentry Mode Live Access lets you view your vehicle's cameras in real-time using the Tesla mobile app. This feature requires Tesla's Premium Connectivity. When using View Live Camera, your vehicle will periodically flash its exterior lights and displays a message on the touchscreen, notifying others that the area surrounding the vehicle is being viewed through the cameras.
To enable the View Live Camera feature, touch Controls > Safety > Sentry Mode > View Live Camera via Mobile App on the car's touchscreen. First, ensure no occupants are in the vehicle, and all doors are locked. Then, navigate to Safety > Sentry Mode > View Live Camera in the Tesla app. The live camera feed is fully encrypted and cannot be accessed by Tesla, ensuring your privacy. View Live Camera is limited to approximately one hour (or 15 minutes for some regions) of cumulative usage per day. Although Sentry Mode Live Access is widely available, it is not currently available in all markets.
If your vehicle is equipped with a pedestrian warning speaker you can press and hold the microphone button in the app to transmit your voice through the speaker, potentially deterring would-be intruders or vandals.
When Dog Mode or Sentry Mode are enabled, you can also switch the live camera view to see through the vehicle's interior camera. This can be useful if you want to check on your pet while away from the vehicle. Note that this feature is not supported in vehicles with Autopilot computer 2.0 or 2.5.
Tesla Sentry Mode is a valuable security feature that can help protect your vehicle from potential threats. By following the steps provided, you can set up, enable, and customize this feature to fit your needs. As a Tesla owner, using Sentry Mode can give you peace of mind, knowing that your car is actively monitoring its surroundings for potential threats. While no security system can prevent all attacks, Sentry Mode offers an added layer of protection that can help deter criminals and keep your vehicle safe.


![Tesla Launches 'TeslaVision' Contest With Big Prizes — See Last Year’s Winner [VIDEO]](https://www.notateslaapp.com/img/containers/article_images/2025/tesla-vision.webp/0458df1c6ed085c427608f0cf762de64/tesla-vision.jpg)
![Tesla Officially Unveils New Model S and Model X: All the Changes [Photos]](https://www.notateslaapp.com/img/containers/article_images/2025/refresh_s_x_1.jpg/31a01e933ae496b97965b27db360f11b/refresh_s_x_1.jpg)


![Driverless Tesla Robotaxi Spotted on Camera in Austin [VIDEO]](https://www.notateslaapp.com/img/containers/article_images/robotaxi/robotaxi-public.webp/5ffd9ed0c2c7f9dbfee05decb1c19a2f/robotaxi-public.jpg)
![New Model Y Performance Hits Nürburgring -- Our Best Look yet at the Upcoming Performance Model [VIDEO]](https://www.notateslaapp.com/img/containers/article_images/model-y-2025/model_y_performance_front.webp/a1fc68836e87fa694d414637ec5278b5/model_y_performance_front.jpg)
![Tesla Update 2025.20 Adds Multiple Camera Improvements [VIDEO]](https://www.notateslaapp.com/img/containers/article_images/tesla-screen/camera-toggle-wide.jpeg/cc9bd521da6a6d31af3812c1def70725/camera-toggle-wide.jpg)